PaintBrush - More Tips (2 of ?)
(Paul W. 05/04/07)
What we're going to do with this week's tip is try to create a document that shows directions to a particular place. We're going to use Paint for most of this exercise and learn some tricks along the way. I want to create a document that guides you to Moraine Hills State park near my home. So let's get started.
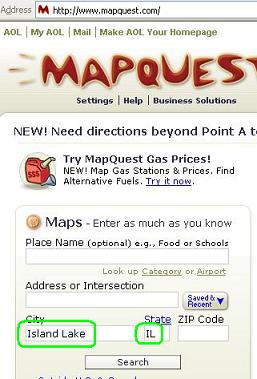
Open your browser and go to www.mapquest.com. Now open Paint (Start > All Programs > Accessories > Paint). Then Alt + Tab back to your browser. On the Map Quest site type "Island Lake" in the "City" box and "IL" and the "State" box. Then click on the "Search" button.
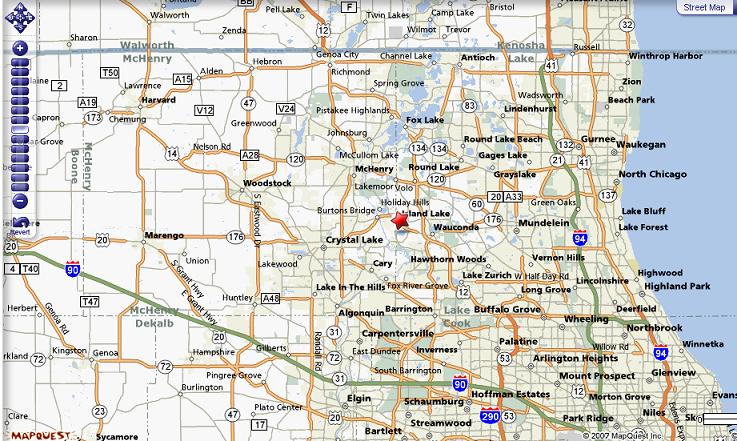
The map should look pretty much like this:
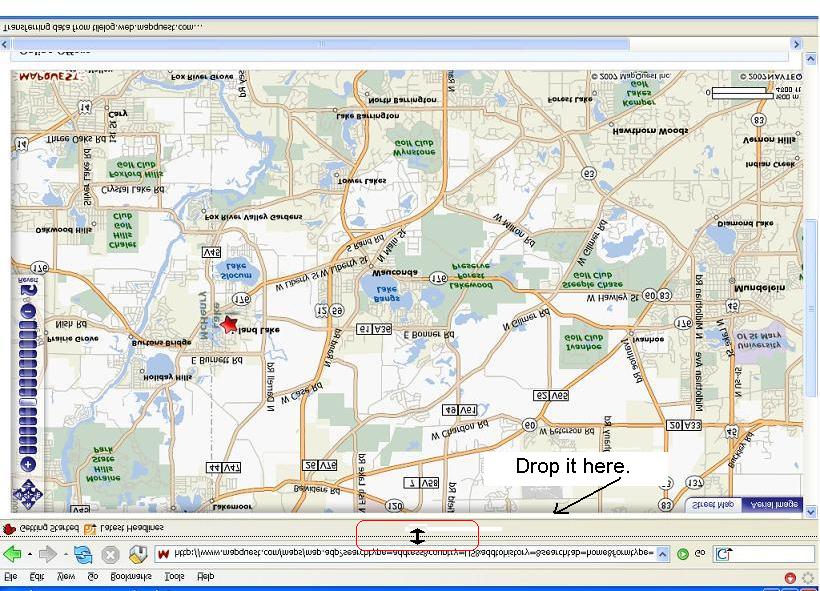
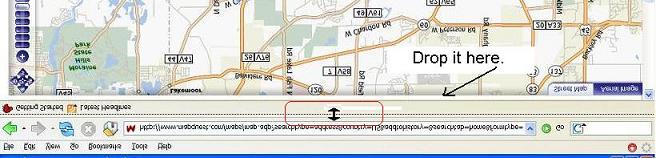
Zoom to level 9 by clicking on the sixth blue button ( ) from the top on the left. Now click somewhere near the middle of the map and keep the button down on your mouse. Drag the mouse so the map scrolls until you have the Moraine Hills State Park in the upper left-hand portion of the screen, then drop it (let go of the mouse button). That alone is a cool trick that Mapquest has, but that's not our weekly tip. It's just an extra.
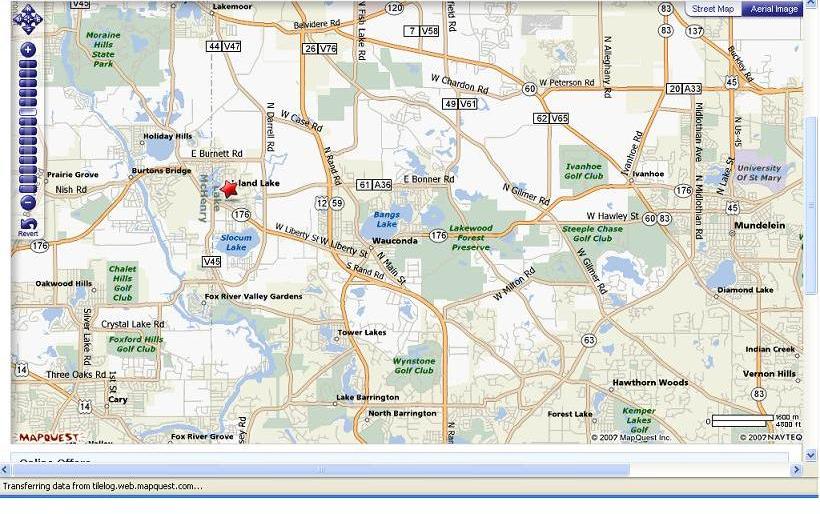
Adjust your browser window so the map is centered as much as possible. We don't want anymore of the stuff above the map or below the map to show than we have to. Now take a screen print of the whole screen. If you don't have Snagit or other Screen Capture software just tap your "Print Scrn" key on your keyboard once. Then Alt+Tab back to Paint and paste the print screen into Paint (Ctrl+V). You should see something like the picture below. If not and I've confused you by this point, just right-click on the picture below and choose "Save Picture As" (in Internet Explorer) or "Save Image As" (in Netscape), depending on your browser. Save the picture somewhere you can get to it easily and then open it in Paint.
You can close your browser now if you want. We're done with that for now. So we want to doctor up this map a little bit and learn some Paint tricks along the way. First thing I notice is that we have the browser menu bar, address bar, etc. above the map and we don't need any of this in our picture. So how do you get rid of it? There are a number of ways, but when you have the whole top of the picture to get rid of, here's a neat trick.
Click on Image > Flip/Rotate
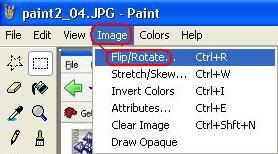
Check Flip Vertical and click on OK. The picture should be upside down now.
Scroll all the way to the bottom of the picture if you need to. At the very bottom of the picture in the middle there should be a very tiny dark square. (There's one just like it on the very lower right-hand corner of the picture and the far right side of the picture half way up.)
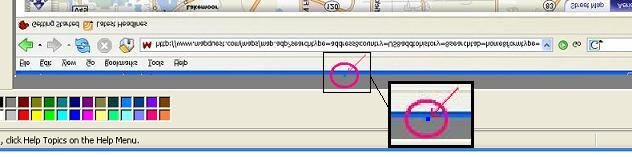
When you get your mouse arrow tip right on this little square it will turn into a double-sided black arrow. Click and drag that double arrow up to the very edge of the map and drop it.
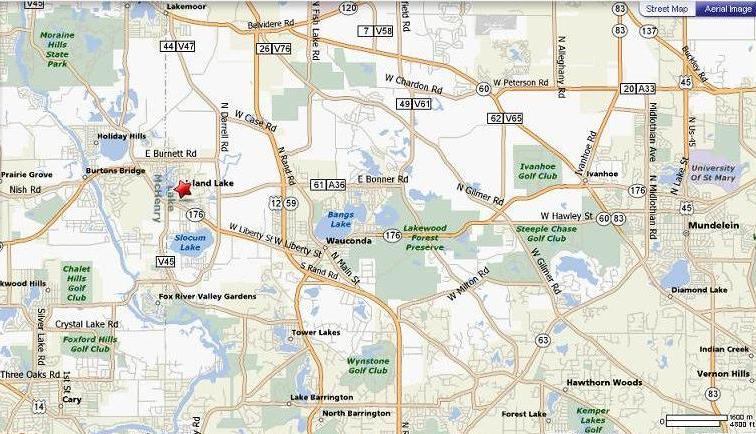
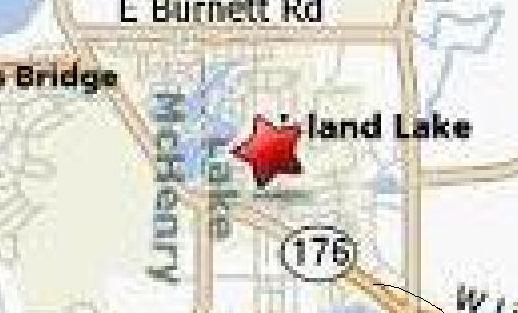
Now go back to Image > Flip/Rotate, click on Flip Vertical again, and OK. Look at that! You just got rid of the whole top section. Your picture should look pretty much like this now.
If you want to get rid of the navigational control on left side you could apply the same principal only use the Flip Horizontal instead of Vertical. Then get rid of the extra stuff on the right side of the map and on the bottom. Just use those little squares and click and drag. (I'm sure Microsoft has a name for those little things but I'm not going to research that.) So now it should look like the picture below.
There are two more things I want to do. 1. Move the red star from Island Lake up to Moraine Hills. 2. And get rid of the "Street Map Aerial Image" stuff in the upper right-hand corner. To move the star you could use the "Select" tool (the dotted rectangle in the upper left corner) or even the "Free-Form Select" tool next to it. But let's try something first to do a better, cleaner move with this star. Use this keyboard combination and watch what happens. Ctrl + Page Down Woe! You just zoomed in on the upper left-hand corner of the picture. Now scroll down and over so you can see the red star.
Click on the "Free-Form Select" tool (the dotted star  ) Outline the star with this tool. (This may take a little practice.) Once you get it outlined (you have to connect the end to the begining), "cut" it either with the Ctrl + X keyboard combo or with the Edit > Cut menu option. Then use the Ctrl + Page Up keyboard combo to go back to the normal size. Make sure the "Image" > "Draw Opaque" option is turned off. Then do a Ctrl + V or "Edit" > "Paste". The red star should now be in the upper left-hand corner of your screen. Drag it and drop it right above the name of the Moraine Hills State Park. (shouldn't have to drag it too far)
Lastly, go over to the upper right-hand corner and with the "Select" tool ( ) surround the
  . Tap the Delete key to delete this and we're done. Save the picture as whatever you want to (use a .gif or .jpg per last week's tip to save space). Now you can insert this in a Word document or an email, or other as needed. Or maybe you just want to print it out, frame it, and hang it on the wall? ... Nah!
This was kind of a long tip wasn't it? I'll try to keep them shorter in the future.