How To Increase the Size of Your Current VMware Virtual Drive
(Use these instructions at your own risk. I provide no guarantee/warranty!!!)
NOTE: This is the way I did it on my Linux box running Windows XP Home inside of VMware.
Before you start this process you will need a bootable disk (floppy, CD, etc.) with some sort
of cloning program. (e.g Ghost, PQ Image Center, Clonezilla, etc.) !!! ALSO !!! Back up your virtual machine before you start this process in case something goes wrong. (I just copied the directory that holds my virtual machine files to another directory with a different name.)
1. Open your Vmware session.
2. Choose the virtual machine you want to increase the drive size on.
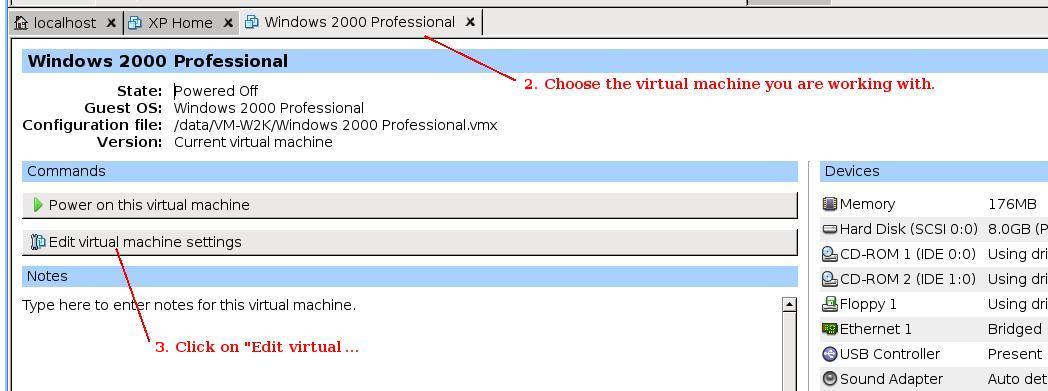 3. Click on "Edit virtual machine settings".
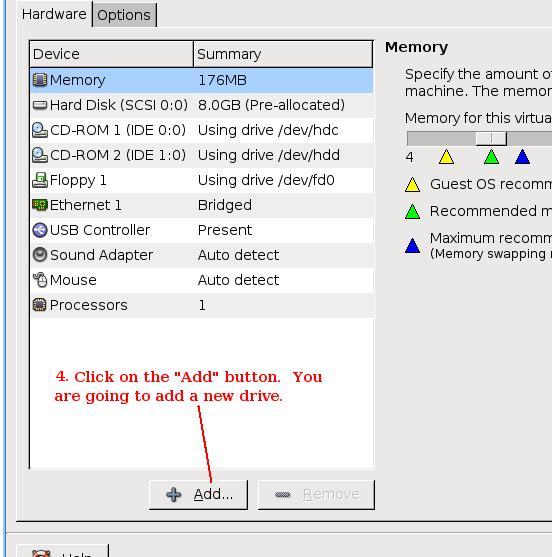
4. Click on the "Add" button. You are going to add a new hard drive.
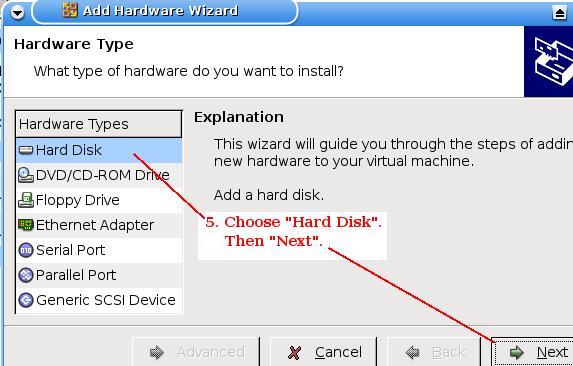
5. Choose "Hard Disk" from the "Hardware Types" list. Then click on "Next".
6. Choose "Create a new virtual disk".
7. Choose the type (IDE or SCSI).
8. Choose the size you want to make the disk and then follow directions to complete this process.
9. Now boot the virtual machine so that it recognizes this new drive. Then shut it down.
10. If your virtual machine is not already set to boot to a floppy disk or CD, you may need to press the
F2 key at the black VMware boot screen to get into the bios and change the boot order as needed for the boot
disk with your cloning software.
11. Boot the virtual machine again, only this time with your cloning boot disk.
12. Do a drive to drive image from your old smaller drive to your new larger drive. When it it done, shut it down.
13. Repeat steps 2 and 3 above and then use the "Remove" button to remove the older smaller drive.
This should do it. When you power up your virtual machine now, it should use the new larger virtual drive.
(PDW 12/02/07)