How to Migrate Outlook From One Machine to Another
(or from an old profile to a new one) 09/27/12
Note: These instructions are for a Windows XP workstation. For Windows 7, you will need to use the C:\Users folder in place of C:\Documents and Settings, C:\Users\username\AppData\Roaming\Microsoft in place of C:\Documents and Settings\username\Application Data\Microsoft, and finally, C:\Users\username\AppData\Local\Microsoft in place of C:\Docum...\username\Local Settings\Application Data\Microsoft.
1. If you are using the same computer with the same user/username, login to the computer in Safe mode with an administrator account. If you are using a different computer or new Windows profile, you can do steps 2-6 as the current user.
2. Go to the C:\Documents and Settings\username\Application Data\Microsoft folder. (Where username is the user's account name.)
3. Rename the Outlook folder to Outlook-old (or whatever naming convention you prefer).
4. Rename the Proof folder to Proof-old (or whatever naming convention you prefer).
5. Rename the Signatures folder to Signatures-old (or whatever naming convention you prefer).
6. Now change to the C:\Documents and Settings\username\Local Settings\Application Data\Microsoft folder and rename the Outlook folder to Outlook-old.
7. Now either go to new computer or login with the new Windows profile on the same computer.
8. Login to the network with the user's credentials.
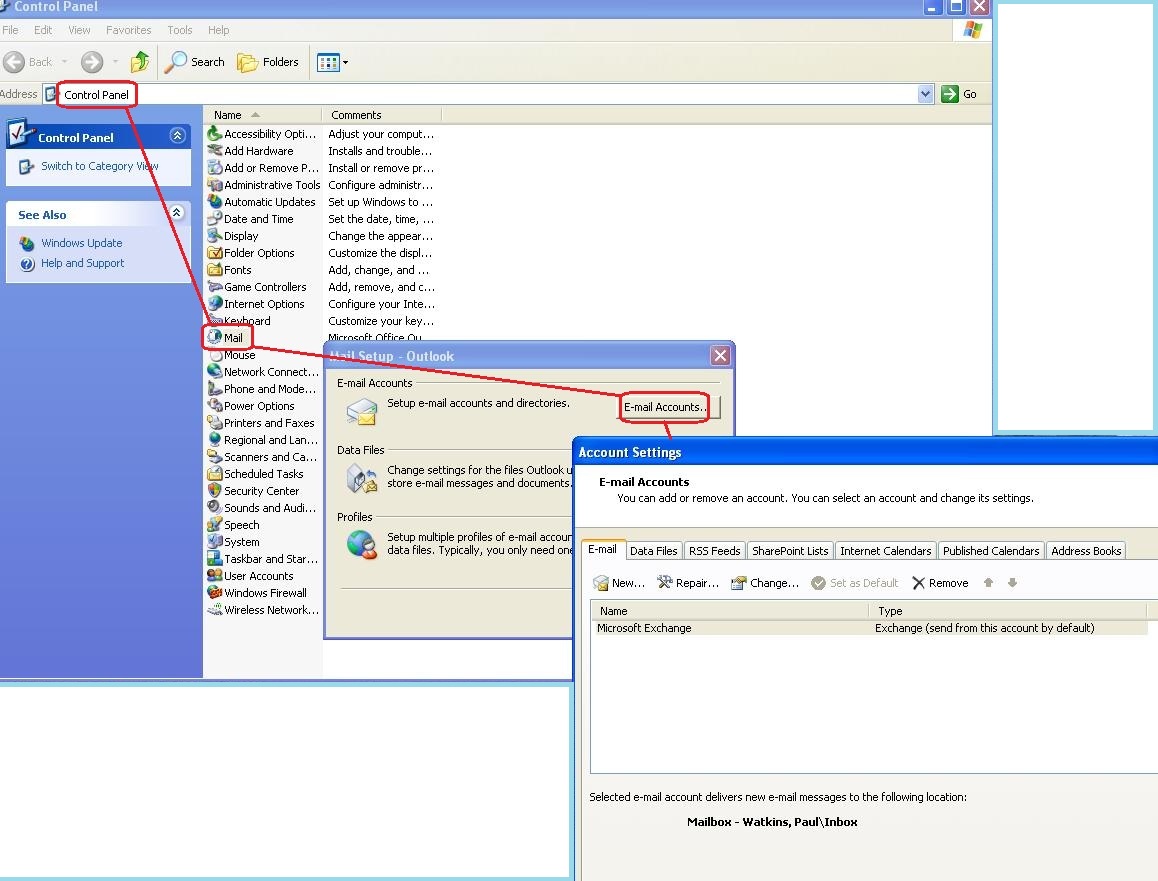
9. Open Control Panel > Mail > E-mail Accounts.
 10. If the old Outlook account is there, click on it and then remove it with the "Remove" button.
 11. Click on the "New" button to create a new account.
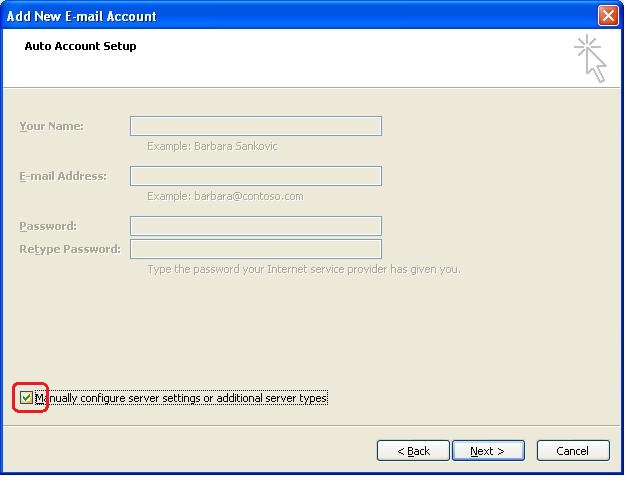
12. Check the "Manually configure ..." box and then "Next".
11. Click on the "New" button to create a new account.
12. Check the "Manually configure ..." box and then "Next".
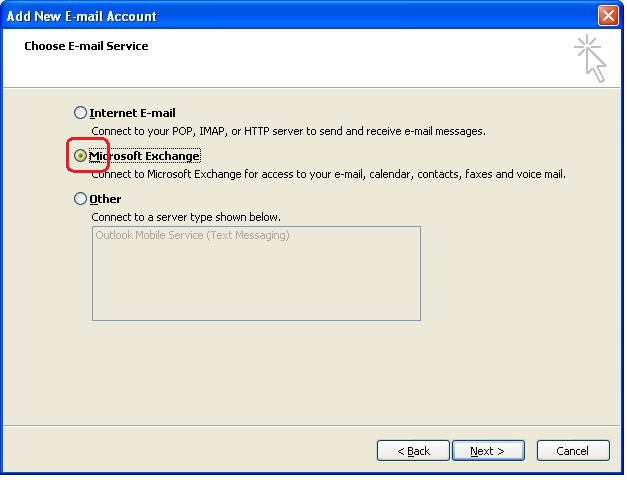
 13. Check the "Microsoft Exchange" option and then "Next".
 14. If this is a desktop or virtual desktop computer, do not check the "Use Cached Exchange Mode". If it is a laptop that may be used offline, you will want to check this so the user can work on their existing emails while not connected. Then click "Next".
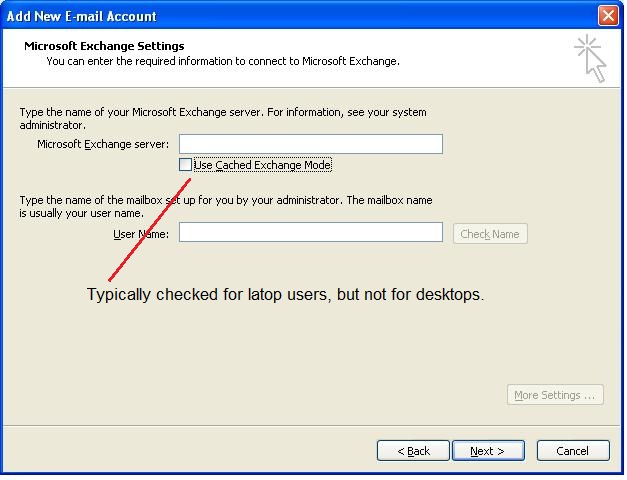 15. Type the server name in the box and the user's account name in the "Mailbox" box. Then click on the "Check name" button to confirm the account exists on the server.
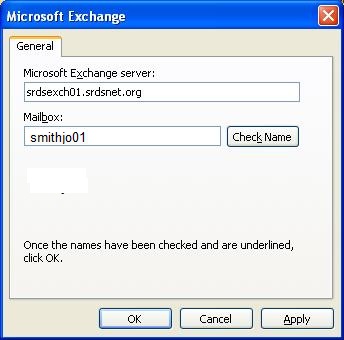 16. Click OK and the account should be created and ready to use.
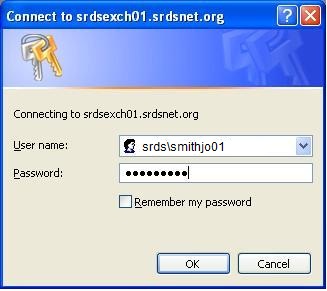
17. Now open Outlook. Enter the username and password and click OK. DO NOT check the "Remember my password" box!
16. Click OK and the account should be created and ready to use.
17. Now open Outlook. Enter the username and password and click OK. DO NOT check the "Remember my password" box!
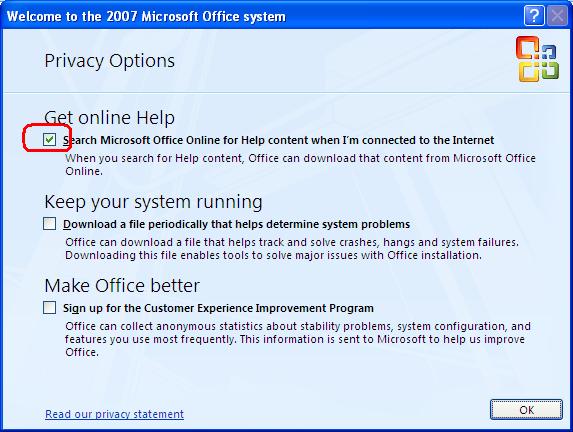
 18. Check the "Get Online Help" if any of the three options.
 19. Once Outlook opens completely, close it.
20. Now replace the two new "Outlook" folders and "Proof" and "Signatures" folders with the backups you made in steps 3 -6.
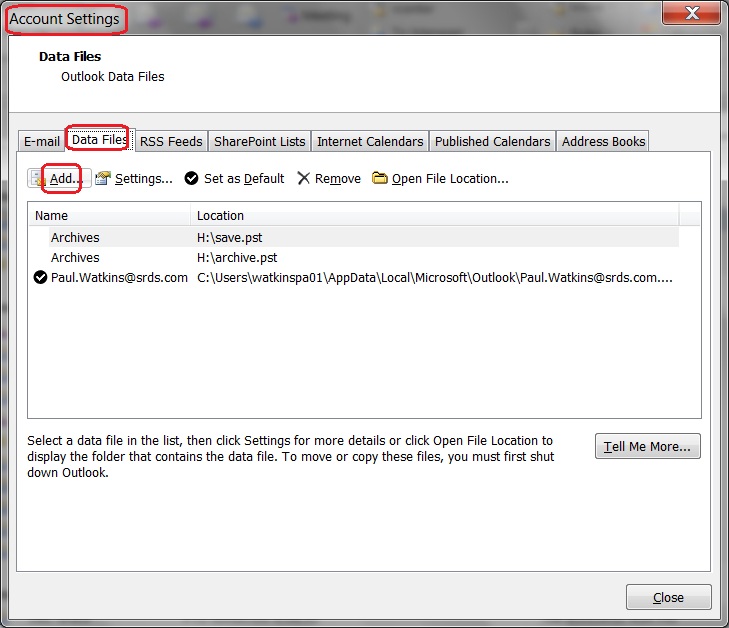
21. Now open Outlook again and go to the "Account Settings" and add any *.pst files associated with the user's account.
19. Once Outlook opens completely, close it.
20. Now replace the two new "Outlook" folders and "Proof" and "Signatures" folders with the backups you made in steps 3 -6.
21. Now open Outlook again and go to the "Account Settings" and add any *.pst files associated with the user's account.